Oct 17, 2012

Turning 2, 5'x7' rugs into an 7'x10'

When I redid Ryan's office I needed to figure out a way to cover the ugly parquet flooring.  I wanted a huge area rug to cover majority of the space.  Problem is, I'd need a rug that was about 8'x10' and those suckers cost a lot of cash.  I found one that I loved at West Elm, but it was $750.  I've got 2 kids, an 80lbs dog and a very hairy cat... plus, a slob(isn) husband.  No way am I investing in a beautiful area rug right now.  Not for at least another 10 years! 

West Elm
I started thinking about how I can cut the cost of an area rug that is just going to get ruined in a couple of years.  5'x7' rugs are readily available EVERY WHERE! and are relatively cheap.  You can find them places like Ikea or Home Depot for $50-100 bucks.  Hummm, 2, 5'x7' rugs side by side would be one big 7'x10' rug.  That could work!  I see Ikea do it all the time in their catalogues.

I went to JYSK and picked up 2 white shag rugs for $70 each.  Plus, I had a $25 off coupon because I am a loser and went to the Burlington new store Grand Opening special and waited in line for 40 minutes to get a $25 gift card and $25 coupon.  So anyway, my 2 rugs came to about $130 bucks.  But when I put them in the office, this is what they looked like after you stepped on them.


They slip and slide every where and it was pretty obvious I was being cheap and trying to pull off 2 rugs as one.

This is how I attempted to solve my problem.

I flipped over the rugs...


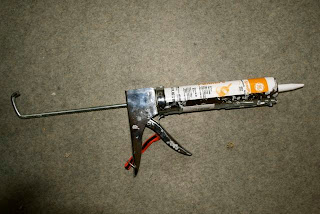
 Got out my caulking gun and loaded it with what ever extra caulking I could find in the basement


Drew some pretty pictures with the caulking and made James laugh


Let it sit for 24 hours to completely dry.  The safety pinned the 2 rugs together.


Now it looks like this.

Yup, still looks like I bought 2 rugs and am trying to make it look like one.  But ya know what, it was only $130 bucks, and there is no way you are going to find a 7' x 10' area rug for that price.  I think this method would work great in a place with more furniture.  Like a family room with couches and a coffee table to hide the seam.

I might move these into my family room and consider buying a nice rug for Ryan's office and just forbidding the children and animals to go in there... yeah right!!!


Oct 12, 2012

Favourite Finds Friday

Can you tell I am in Bathroom Mode??

I'm obsessed with renovating my bathrooms right now.  They are horrible! So horrible, I'm hesitant to even post pics of them!  I've had the contractor out, I've narrowed down the looks I want, now, I need to convince the boss (the ver dreamy and handsome boss) it's time for a new project (I got new shutters for my birthday, maybe I can get new bathrooms for Christmas??)

Anyway, I found some pretty cool stuff while shopping online for bathroom stuff.

Imagine having this on a bathroom floor.  I'd have a sign on the bathroom door that said "Tip Toe only please".
Fishscale mosaic with bardiglio imperial marble in hammered finish and bianco carrara marble in honed finish.  AnnSacks.com
Chamberlain Vanity by Cole + Co.
Miguel Double Sconce by John Rosselli through Circa Lighting

Sculpted Mums Shower Curtain, Anthropologie

Oct 10, 2012

Exterior - The Finale!!


Baaaaaaa, I am having HUGE buyer and designer remorse.  I am so doubting my choices now that it's all done....errrrrr I hate that feeling.  Should I have got the door in black?  Should I have gone with a lighter shingle?  Should I have gone with a chocolate shutter?  Blah blah blah.  I know the answer to all my questions.  NO.  There was a method to all my madness and I have to remind myself that in reality, you don't always get what you want.  You have to be smart and practical when spending a ton of money on renovations.

Yea, I kinda still wish I painted my brick.  But after living in the neighbourhood for a bit, I realized that my house would stick out like a sore thumb with painted brick.  NO ONE paints their brick houses around here.  And it would have been so hard to pick out the perfect colour.  It could have easily gone wrong, really wrong.  I had a painter come out, and once he realized I wanted to paint my brick, he never even called me back with a quote!!  So, okay fine!  I have to work with what I got.  Pink brick.

The red door really does compliment the brick, and I don't regret getting it.  But, I am a little pissy about the roof I got.  It's too gray.  When you are picking from a 2" swatch, you kinda have to just cross your fingers.  Big mistake.  I should have taken my time and gone around the neighbourhood and studied the roofs more.  Lesson learned.

I really struggled with what colour to do the shutters, portico and garage.  Brown, Black, Gray.... I was not interested in having the new shutters custom painted.  It would have cost a fortune, so I had slim pickings as far as standard shutter colours.  I had this designer guy come to my house to talk about front doors, and he suggested just painting everything the same colour as the window casing and having it all blend in nice.  Then let my fabulous ( and ridiculously expensive) front door POP.  He was right....  don't go all 'designer-chic-bananas' and just keep it simple.  So I did.  Standard Taupe all around!!

You know what, I do like the outcome.  I worked with what I had and I think the house looks up to date and loved.  It's just, if you look at the other rooms I have done (like the office, and toy room), I clearly love WOW rooms.  I was hoping to have that on the exterior as well, but through this process I have learned that sometimes neutral is best.  Let the space speak for itself.

Anyway, I hope you like what I have done.  And if you don't, lie, and tell Ryan you do because he forked over a lot of dough for me.  He loves me.  Right, honey xoxo

And come spring, I've got a lot of landscaping to do... I'm tired just thinking about it.

Here's a list of what I did to update the exterior.
- New custom front door (Lakecity Home Imporvements, Burlington)
- New pot lights (ATI Electric)
- New light fixtures (Murray Feiss - Secolite, Burlington)
- New house numbers and moved them to the portico (Ebay)
- New exterior shutters (Dinesol, Tan, Raised Panel - Lakecity Home Improvements, Burlington)
- Removed dead tree from front garden (Thanks to Tom, Dave and Bryan from ATI Electric!  Awesome guys!)
- Painted Portico and Garage door (Custom Colour, Behr)
- New roof and facing on portico (Main Street Roofing, Burlington)
- Painted garage door hardware and mailbox(RustOleum, Black)

Best surprise ever!  Coming home to new shutters.

I was going to save the old shutters and do something crafty, but they were in rough shape.  Bye, Bye!

The guys putting in my new pot lights.  The kids loved watching them work on the roof!

Multi talented electricians.  Thanks guys!!!

Getting my new front door!  So exciting!

Oct 9, 2012

Good Deals!!

I recently scored this bench from my local Salvation Army for just $10 bucks.  I'm dying to re-purpose it, but I'm not sure where I'm going to use it just yet.  I'm thinking about putting it in my front foyer.  Once I decide, she'll get a make over.


My Mom found this console for me at a Garage Sale for just $20 bucks.  I'd like to paint it and turn it into a make up vanity for my bedroom.  ust have to find a mirror and chair to go with it!


I've also got these 2 kid stools that I'd like to re-do. One is from my old farm.  The previous owners left it behind.  I've already painted it black.  And I believe the other is from my mom-in-law (I take so much from her basement store, I can't remember!).


I'd like to do something fun with these guys.  One day when I am feeling creative!

Anyway, those are some upcoming projects.  Stay tuned to see how they turn out.
That's it!

Oct 7, 2012

Painted my garage & portico!


Errr, my exterior is almost done!  It's taking forever!  But, I can see the light!!!

I just finished painting the garage doors and the portico.  I had the colour custom matched to my new shutters - which are taking forever to come in. 

Even my Brother noticed I painted - so I must be something right!!!


 I had to get up on the portico roof to paint the very top.  The kids got such a kick out of it.


The colour also matches the casing around my new front door.


It's gonna look so good when it's finally all done.  Just patiently waiting for my new shutters.  I bought them as a Birthday gift for myself, so with my luck, they'll come in on the 21st!!

 This is how my house is looking today.  I'd also like to get some new garage door hardware.  Some nice chunky door pulls.

It doesn't look like it too dramatic of a change, but once you see the final before and after shots, you'll see.... such a huge difference.

Have a Happy Thanksgiving Everyone!


Oct 5, 2012

Favoruite Finds Friday!

As promised here are my favourite finds from this week.

I started Christmas shopping!!!  I like to give myself a head start each year so that I can find a perfect, unique gift for everyone.  I love shopping online, so I always leave myself 6-8 weeks since some orders (especially custom ones) can take a long time to get to my door.  Plus, if I shop over seas, I can expect major delays no doubt!

I was browsing my favourite sites and came across some cool things this week.

From ThinkGeek. com, this awesome DIY Guitar Pick Punch is just $24.99.  You can punch a guitar pick out of anything.  So Cool!


The Obsessive Chef Cutting Board.  Found here for just $25 bucks.  I WANT this so bad!  hint hint... This is such an awesome idea. 


Williams Sonoma, bar far, has the most beautiful wreaths.  I'll take 2 of these for the fall, and 2 of those for the spring.


I'm inlove with this Julien MacDonald wallpaper available from Graham & Brown.  I want to do my whole dining room in it, but at $85 a roll, I may have to settle for just my powder room.

This bathroom vanity is available in a number of colours and I just love the rustic look.  It starts at over $1200 bucks, but I think it's unique and worth the money!  See all the available styles at fixtureuniverse.com

Oct 2, 2012

Embracing Change Blog

Embracing Change
Hi Friends...jump over to Embracing Change to check out one of my favourite blogs.  My Brass to Black Fire Place Make over was featured today on her Creative Inspirations Link Party.

It's a great place to see what the other blogger friends have been up to all week.

Fireplace Make Over

Sep 30, 2012

DIY Wall Mount Guitar Holder

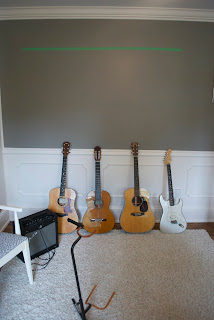
Ryan has always wanted his guitars mounted on the wall for easy access and to make his space feel like more of a "man space".  Unfortunately, we've never lived any where long enough for him to have his own space...until.... NOW!!

Last week, I sacraficed a work space of my own, for Ryan to have his own, full out, man room.  So, I gave him his guitars on the wall, just like he always wanted... love you xoxo


DIY Wall Mount Guitar Holder

First Step: Go to Home Depot and gather your supplies.
- Heavy duty screws & anchors
- Heavy duty utility wall hooks -found in the garage organzier section.
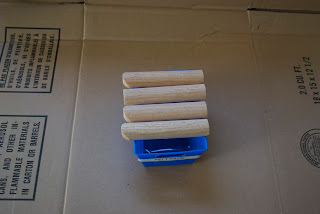
- Some sort of wood!  Ryan bought these bull nose caps, used to cap edges of stair treads.  They were quality wood, cheap, and the perfect size.  Just over $2 bucks a piece.
- Paint - what ever you have laying around.  I used some black spray paint - it was for plastic.  No one needs to know


These things are just $2 bucks at Home Depot

I chopped the wood pieces in half using my chop saw.  They weren't all a perfect length, and some had round edges, some have straight edges.  It really doesn't matter since the guitar will be hiding the wood piece.  I am soooo not a perfectionist!!!

Then I painted them black..


Then I drilled holes for the screws.  I measure about an inch and a half from the end.


Then I drilled massive holes to fit the utility hook.  Wish I had a drill press for this, but my hand held drill did it's job eventually.  You can see where the wood split a bit on the edge of the holes.  I just sanded it out nice and gave the pieces another coat of paint.


I love using painters tape to measure out hanging stuff on the wall.  I spaced the hooks about 18" apart.
First I screwed the utility hook into the piece of wood.  Then, to get them on the wall, I hammered my anchor into the wall, and screwed the piece in place.  Make sure to use a level to ensure it's straight.

Yup, looks good.  Three more to go...

So, here they are all up on the wall.


Rock Star...
James: "MOMMY! The guitars are hanging up!"  He was seriously astonished.  Confidence booster for me.  Who cares if it comes from a 4 year old!


They look awesome from the hallway!

That's it!  I never said it was rocket science!!  Way cheaper than the store bought wall hangers and they look just as good!

Each wall mount cost less than $4 bucks to make.  The retail at the store any where from $20-45.  I'm so thrifty.