Apr 29, 2012

Drum Roll.... The Kitchen.

Here it is.  The Kitchen!
Yes, it looks dated and you kinda feel like you're in an RV, BUT I can see it's potential.  I've got BIG plans for this place, but it's going to take some time and money, so it'll happen slowly but surely.  I'm not interested in doing a gut job since the cabinetry is in great shape and I love white kitchens, but it'll need a few major fix ups in other places...


 First things first - that built in seating...bahahha....  It makes me laugh.  I'll be recovering the seating in this beautiful Richloom fabric.  It's an indoor/outdoor fabric which makes for easy clean up from the kiddies.  I'll also be doing some faux roman shades in the matching geometric print.


Next, I'll be replacing the knobs.  The Empire Suite Collection from Lee Valley Tools.  The sub zero fridge bugs me, but I don't want to replace it, so I think adding an appliance handle to match the cabinet knobs will update it.


Next, I'll tackle the odd corner sink.  (And replace the dishwasher to something stainless steel)


It's an expensive Corian sink, but I can't stand white sinks.  I want a nice, new, clean, unscratched stainless steel sink.  The actually make corner drop ins.  I'll get an inexpensive one to serve me until I change the counter tops.  Which BTW won't be happening until the kids are a little older.  The countertops right now are Corian which is hard and durable.  It's perfect for the kids to try and destroy.  When they are older, and a little less destructive, I'll invest in a natural stone top.  For now, I will dress up the place to try and hide the pinkish Corian!!!  Anyway, back to the sink.....
This one is from Home Depot.  I'm thinking something like this.  I like it!
When I redid the kitchen on our farm, I bought the most incredible faucet EVER.  I miss it, and I plan on forking out the dough to get another one.
I hope it fits under the cabinetry!??!

A few more pics...
Crazy ugly cook top and wall oven.  These need to go.  No one likes cooking in someone's appliances.  Yuck.
I'm liking this little nook built into the pantry.  It's a great place for my ipod dock, or.....

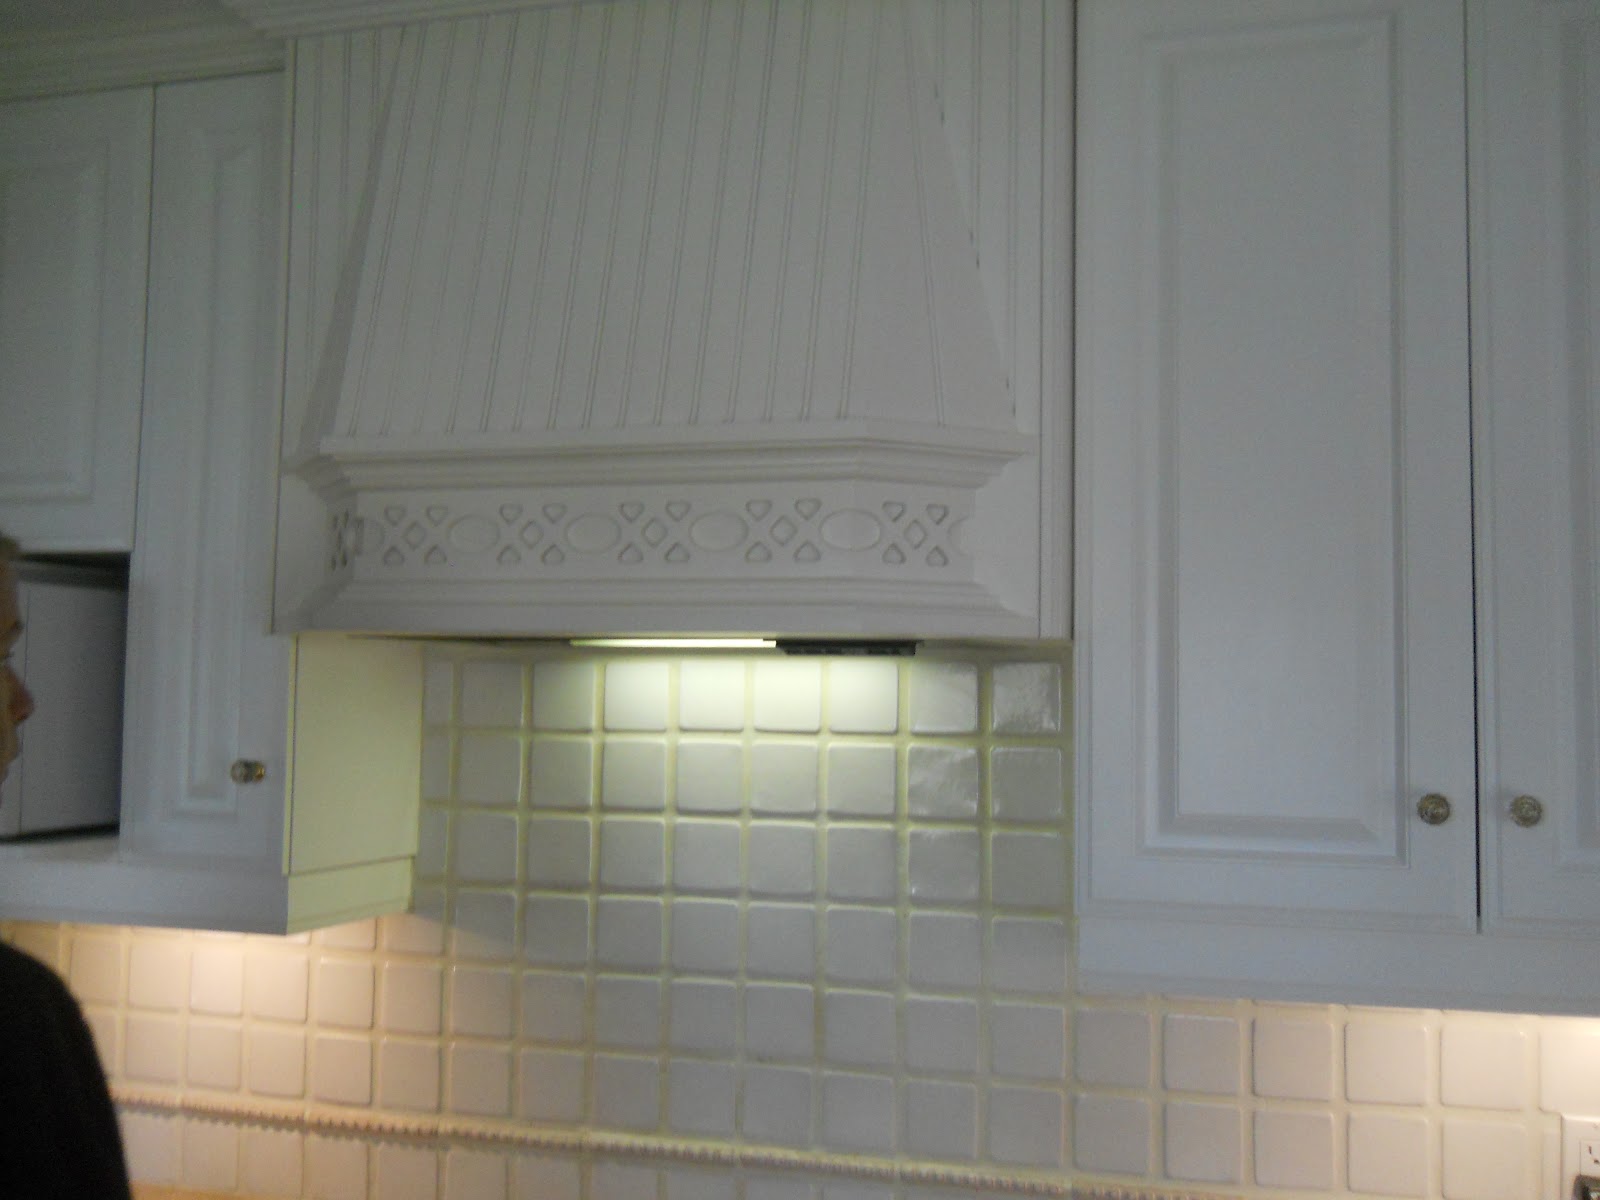
The Range Hood - I like how it's got that Georgian feel.  It'll look nice when I add the black iron knobs.

Let's talk long term.  See that backsplash...My Gawd... It's not bad since it's just white and quite timeless, but I don't like it!!!!  Unfortunately, They grouted the thing to last 500 years, so even if I attempt to pull it off, I'll have to re-drywall everything.  Another project that will have to wait until I replace the countertops.  Ever heard of those self adhesive  tiles.... They have been getting awesome reviews on the blogs I share.  I wonder if they'd work here???  Good temporary solution?  Meh, could be super cheapo looking
So long term.  Say good bye to that useless wet bar on the back of the built in seating.  There is a small bar fridge underneath and quite frankly, the only booze in my house is the box of wine in my fridge.  So, that'll be ripped out, the seating will be ripped out and the upper glass cabinets will be ripped out.  That will leave a huge beautiful space for an eat in kitchen. 


When we moved from the farm, my Dad and I salvaged a few antique doors from when the house was originally built.  We plan on using them to make a huge dining table.  I can't wait. 

hgtv.com
So that's it...my kitchen.
CAIT

Apr 27, 2012

DIY Crayon Art

Me and the kids gave the oh-so-famous-on-pinterest-crayon-art a try!  I must say, I think it turned out kinda cool.

The kids loved sorting the crayons into alike colours, and they loved holding the hairdryer to melt the wax.  Now, it's in James's room and we play eye spy with my little eye with it.  Fun!


CAIT

Apr 26, 2012

Main Floor Office

To the left of the front foyer is the main floor office.  I love this room and it will serve as a great place for Ryan to shut the door and take over the world.  As far as decorating it goes, I haven't given it much thought. 


I'd love to paint the wood work and maybe even wallpaper.  I'm thinking some masculine, but classic, and not too formal.  A few inspiration shots...

Black Lacquer wood work, lots of red with gold grommets and accessories.

Could be a little too formal.  But who can resist gorgeous wood work.
Love white built ins & moulding with a dark colour on top. 

Red, black and lots of natural materials like sisal and wicker.

Regardless, the room has to revolve Ryan's new John Lennon lithograph.  I'm hoping it'll fit between the built ins and be a real focal point of the room.


Stay tuned!!

CAIT

Apr 25, 2012

Front Foyer

Here are a few pics of the front foyer.  It's quite large and I've always wanted a house with a curvy center staircase.  The glass door leads to Ryan's office.  And the living room/dining room is through the open doorway.


Nothing major to do here, but I would love to buy a new light fixture and some sort of seating or storage for against the wall.

Urban Outfitters $649


Click Lighting and Home $515
Restoration Hardware $370 (I'd want 2!)


Pottery Barn $518
Pottery Barn $908


Apr 24, 2012

Exterior Paint - HELP!!!


The exterior of the new house needs a major facelift and I can't decide what to do. For sure, I'll be planting a path of boxwood from the driveway to the front door.  Boxwood is one of my favourite greens!  I'll also be doing some nice wicker chairs out front.

Thank you Sherwin-Williams for the awesome paint visualizer. ( https://www.sherwin-williams.com/visualizer/# ).  I've tried the Benjamin Moore and Valspar ones, and they don't compare!

BEFORE! I can't stand the pink brick and the storm doors will be coming off.

My initial reaction is to bring out the Georgian roots of the home and paint the brick white, shutters black, and door red.  Eventually I'll redo the front patio and steps in red brick.  With this, I worry that the house will be too white, and it will really stick out in the neighbourhood.  There are no other painted brick homes on the street.  Not that I mind sticking out..hehe


Painted White Brick, Red Door, Black Shutters and Garage
Same as above, but a little more off white
 Fearing the white is too bright, maybe I should go with a deep taupe brick.  But with this, I worry the brick will be ugly painted.

Taupe brick, Red door, Black shutters and garage

Same as above, but with a black painted porch cover
 Since I am clearly chicken to paint my brick, maybe I should just paint the shutters and door to give it an update.

Black painted shutters and garage, Red door.

Chocolate Brown painted shutters and garage, Red door.

White painted shutters and garage.  Chocolate brown door
I can't decide what to do.  Help!!! 

:) CAIT

Apr 23, 2012

We're Moving Again... yes, AGAIN.

I moved in with my husband 10 years ago, so I guess it's only fitting that we attempt move #10 this year.  That's right, you heard correct; we are moving again.  I know, I annoy myself.

Ryan and I have been trying to get this whole 'life' thing right for the last 10 years now.  I thought I had finally found my place when we moved to the farm, but that proved to be untrue... then I built my dream home, in my dream town and I thought for sure this was it.  But life seems to always throw me a curve ball just when I think I have it all down.  What's the curve ball you ask?  Well, it's medical and kinda personal... But, I can tell you when my brother and his wife announced they were having twins this fall, my curve ball wasn't feeling so curvy.  And to boot, my best friend is expecting in July. 

And so, I'm waving my white flag to my-so-called-country-life and moving back to Burlington.  Ah, Burlington.  Red lights.  Can't wait.  Buuuut, It's also where 3 bundles of joy await my smothering hugs and kisses. 

On to the good stuff...another move means another house.  Friends - meet 1955 Kerns Rd.  My new canvas as of June 13th, 2012.  I walked into this house and secretly knew it was the one.  The house needs a major facelift, but that's the kind of stuff that I LOVE!


Over the next few weeks, I'll be blogging about updating my new home.  I'll share pics of the new house with ideas and inspirations and can't wait to hear your feedback.  My first project is the exterior. 

Stay tuned xoxo


P.S. If you're wondering about my dream home here in Waterford, it sold in 2 days to a nice executive couple who loved the house so much they got suckered into paying full pop.  Enjoy....

DIY Barn Board Coat Rack

Way back when we were tearing down the old barns on the farm, Ryan found this piece of wood and brought it to life as a surprise for me.  I've always cherished it since he made it for me.  While I was unpacking, I found it, and was inspired to make it a functional piece for our new home.


I went to IKEA and bought this 'assembly required' coat rack for $15 bucks.  I liked the hooks and I couldn't seem to find decorative hooks any where in a decent size.  So I chucked the wood and keep the hooks.

I measured them even on my barn board and drilled them in.

I picked up the picture hangers from Walmart and attached them to the back for a sturdy hang.


And there you have it...my very own, completely sentimental and personalized coat rack.


Apr 22, 2012

DIY Side Table

I found this side table in my parents basement a few weeks ago and it made me smile.  This table was in our living room for as long as I can remember.  It made me think of my childhood house on Jefton... I miss that house dearly, so I swiped the table!!!


I wanted to give it a facelift, so I took it home and got to work.  I sanded it down, primed it, and painted a couple coats of a pretty sage green/beige.  I really wanted to paint it red and add this beautiful toile wallpaper my mom-in-law gave me, but the top was too curvy to get a precise cut.  So, I used spray adheisive for the burlap and glued twine around the border to finish it off.

I love how it turned out.  Very cottage chic, and the best part is that I can rip off the burlap anytime and try something new!

I love it!

Feb 17, 2012

Botanical Prints

I have always wanted to do a wall of botanical prints, and finally, I have the space.
It took a few days, but it's complete and I love it!!!


Here's a little "how-to"!
 
I bought the frames from Ikea.  Just $14.99 each.


I downloaded my favourite prints from vintageprintable.com, resized them to 8x10" and uploaded to costco.com.  Just $30 bucks later, I had them printed!!


I absolutely hate hanging pictures even and symmetrical like this because I never get it right.  Especailly with Ikea frames since they come with hooks and wire.  So hard to get the wire at the same height on each frame.
So, I bought this cool picture hangers from Walmart.  With these I am able to attach the hardware in the exact same spot on each frame.  Makes it so much easier to measure and get it even on the wall!!!


So then, I measured out the wall, not once, not twice, but three times and voila!!


Here's a little Before & After!!