Oct 17, 2014

Mixing a Custom Colour using Chalk Paint

I LOVE LOVE LOVE painting people's furniture for them.  Bringing an old piece back to life is awesome, especially when it's a sentimental piece... but 99% of the time, I'm painting the pieces either white or black.  Needless to say, it does get a tad boring every now and then...

Recently, I had a new customer bring me an old dresser she wanted done for her new baby girl's nursery... and she wanted it HOT PINK!!! Yea... a colour ;)  Annie Sloan doesn't make a hot pink, so I custom mixed a colour to acheive the look I was going for...

2 parts Old White to 1 part Emperor's Silk

The key to making a custom colour is lots of practice.  Grab a blank sheet of paper and start mixing, being sure to record your recipe along the way.

Link

I had a hard time getting a good pic of the pink I mixed.  My house is dark and I don't get a lot of natural light, but you get the idea!!


Oct 10, 2014

Side Table Before & After


Another piece my neighbour brought over was this old, beat up side table.  I wanted to sand it down and stain it to match her beautiful sugar cane hall table but the top was just too stained.  So, I decided to give it a few coats of Annie Sloan French Linen, and aged it with the Annie Sloan dark wax.  I picked up the cute paris stencil from The Pained Bench in Hamilton.


This just goes to show that no piece of furniture should be tossed.  With just a bot of elbow grease, and it can look new and fabulous all over again!!


Oct 6, 2014

Mahogany Hall Table Before & After!


Recently, a friend of mine that lives just 2 doors down was moving, and rather than be burdened with moving her beat up and outdated furniture, she left it with me to refinish.... The best part, she says "Do whatever you want.  Work your magic!"... music to my ears.

The first piece I completed was this gorgeous sugar cane hall table.  I didn't want to change it too much, since it was a beauty on it's own, but it definitely needed some work.  You can see the table top was in rough shape.

I sanded the top down and gave it several coats of Minwax Jacobean stain (my favourite colour), and the bottom is finished with Annie Sloan Graphite.


Here's another "Before" pic of the roughed up top...


I'll post pics of the other projects I finished for my neighbour soon!!!

Sep 7, 2014

Backyard Before & After

I'm the world's worst blogger these days.  My backyard has been done for weeks now, and I am just getting around to blogging the before & after pics now.  It has just been a mad house around here.  This summer, we tackled a new deck, new landscaping, 2 bathrooms and a kitchen reno.... all the while, juggling the kids at home and our regular, every day madness.  But thankfully, it's all coming to an end, and I can see the light.

We weren't even planning on doing anything to the yard this year.  It certainly wasn't part of this year's reno budget...whoops.  But after the world's longest winter, I begged and pleaded (whined) to the hubby, and he caved.  

Here are some 'Before" pics of our yard.  It was a completely unusable space.  We had these massive, hideous pine trees and that gave the grass a full layer of prickly needles and nasty pine cones.  The yard was so sloped, that really we couldn't do anything with it.  No garden, no swing set, no fire pit.. natta.  The one piece of the yard that was flat was covered in gravel and weeds.  I believe some previous owners may have had an above ground pool??  I dunno.  All I know is that you had to have shoes on back there, and there was no way to sod it even if we wanted to.  

(I just spent an hour looking for my 'before' pics, and can't find anything, so I'm jumping right to the "during" pics)


Trees are gone and deck footings are going in!

This pic really shows that horrible gravel/weed/must-wear-shoes section

This pic doesn't do the sloped yard justice.  It really was a horrible slope that ruined the space

2 big ass pine trees GONE!

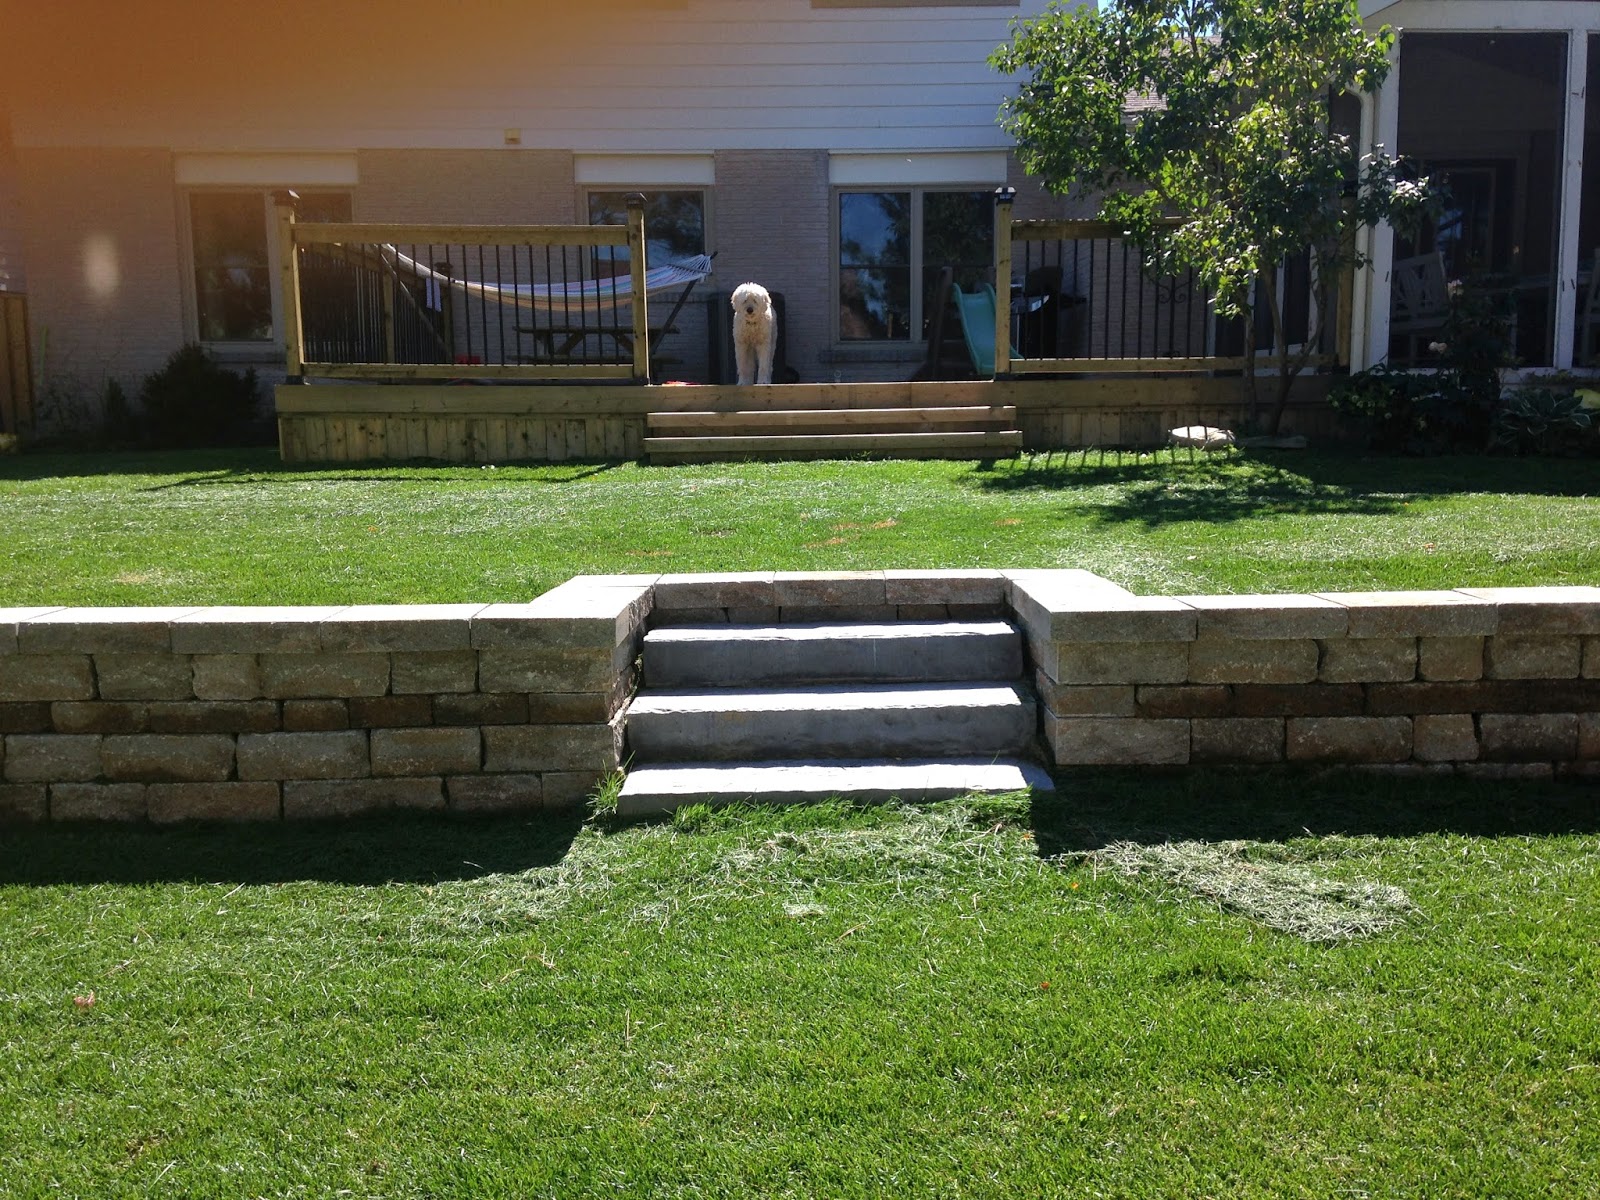
Here are the "after" pics.  I'm very happy with the outcome!


My goodness, my picture taking skills are sucking lately... you get the idea.

We leveled the yard off into 2 separate sections with a whopper retaining wall. I'm inlove with my deck.  Originally, I was going to do something fancy with a built in fire pit and different sections, but at the end of the day, we decided to go with something simple, and functional.  I'm so happy we did, because it's a great, usable space now.

We have a ton of room to do whatever we want now.  We are planning on plating a few gardens, and adding more cedars for privacy next year.  

I also plan on removing that hideous chunk, block thing in the corner some people refer to as a "water feature".  I was adamant against such feature, I am still adamant that such feature needs to be sledgehammered.  So, we will see next year.... honestly, it's embarrassing and needs to go.  Whatever.

Worst part of the whole experience was that it was a 3 week job, that turned into a 3 month job.  My fault for not laying down the law with our landscapers.  Lesson learned through this whole process, is to get EVERYTHING in writing.  Including a reasonable timeline. I still don't understand why people think it's okay to work on several jobs at a time.  Here's my job - finish it - then move on to the next.  SO frustrating.  

At the end of the day, I'm so glad that we forked out the dough to complete our yard this year.  It's been a a great space for us to enjoy this summer, and I SO look forward to adding lots of personal touches next year.  It's a great foundation.  The retaining wall has lent hours of fun for the kids to play on.  They run circles in the yard while I lay in the sunny hammock and drink beer.. Me happy :) (Thanks Hunny!!) So, so, so happy.


Aug 14, 2014

Oak Table Before & After


I've been working on this beast for weeks!!!


This oak table was probably the most challenging, and rewarding piece I have ever done.  It took me many, many attempts to get it right, but when I finally did, it was worth all the elbow grease.  This beast is a beauty and I am so proud of it!!

For the top of the table, I sanded the wood down with my orbital sander using 80 and 120 grit sandpaper.  It worked, and got all the honey colour out, but unfortuantely, the orbital sander left little swirl marks in the wood.  So, I resanded the table (for 3 hours) using just 220 grit paper.  This worked again, but when I put my stain on, I got mega streaks.  I think the wood was actually too smooth, and was just not happy about being stained.  So, back to square one.  But this time, I treated myself to a brand new sander.  A Dewalt 1/4 sheet sander that was just right.  I sanded the beast down one more time with 150 grit, and then 220 grit, and gave her a thin coat of Minwax Pre-Stain Wood Conditioner ... this prevented all the nasty streaks I had previous.  Then, 2 coats of stain in Minwax Jacobean  and finished her off with 3 coats of Minwax Polyurethane in a Satin finish.  The end result was gorgeous.


To tackle the bottom, I did 3 coats of Annie Sloan Old White, gave it a light distress, and a thick coat of wax.  The kids and I also made a trip to The Painted Bench in Oakville to pick out a special knob for the little secret drawer.  I was thinking of getting a pretty mercury glass, or painted ceramic knob, but Grace spotted the birdie, and I couldn't resist!!!


This was the last piece I had to finish to complete a entire dining room.  I'm looking forward to seeing all the pieces together.  Will post pics of everything soon!


Jul 11, 2014

Telephone Table Before & After

I had a wonderful new client bring this awesome telephone table to me this month.  I believe it belonged to her Grand Mother and it has got to be one of the coolest pieces I have done!  I just love how the chair swings in and out from under the table.  So cool.  Anyway, she says "I want it black, but I'm not picky".... 'not picky' is music to my ears!!!

As I am painting a piece, I often find that the piece sort of tells me how it wants to be finished. Many times, I plan on just flat out painting the pieces, but once I get a few coats on, it just screams 'distress me'.  Or the other way around.  I've distressed a piece and gone back and painted in the distressing for a clean feel.  Same thing happens with colour all of the time!!  In fact, I just did a lamp in a gorgeous Nautical Blue... It looks horrible, and I'm planning on redoing it in black.  Although I'll probably stare at it for a few months before I actually get to it.

Before Pic...


After...